| 일 | 월 | 화 | 수 | 목 | 금 | 토 |
|---|---|---|---|---|---|---|
| 1 | 2 | 3 | 4 | 5 | 6 | 7 |
| 8 | 9 | 10 | 11 | 12 | 13 | 14 |
| 15 | 16 | 17 | 18 | 19 | 20 | 21 |
| 22 | 23 | 24 | 25 | 26 | 27 | 28 |
- flaskframework
- json
- CSS
- fetch
- CRUD
- github
- pymongo
- synology
- Algorithm
- OOP
- POST
- frontend
- requests
- NAS
- body
- backend
- mysql
- java
- venv
- Crawling
- atlas
- get
- flask
- beautifulsoup
- openapi
- PYTHON
- portfolio
- mongodb
- Project
- javascript
- Today
- Total
wisePocket
[Flask] Flask Framework 05 첫 사용 (GET, POST 요청과 응답) 반숙!! 본문
[Flask] Flask Framework 05 첫 사용 (GET, POST 요청과 응답) 반숙!!
ohnyong 2023. 7. 8. 21:10버튼만 달랑 있는 기초적인 웹 페이지를 만들어서
GET과 POST 요청, 응답이 이루어지는지 실습했다.
사실상 진짜는 여기부터..
우선적으로 request와 jsonify 라이브러리를 임포트하고
'/test'로 라우트를 지정하고 'GET', 'POST' 예제를 실행해 보았다.
1. GET 방식 실습
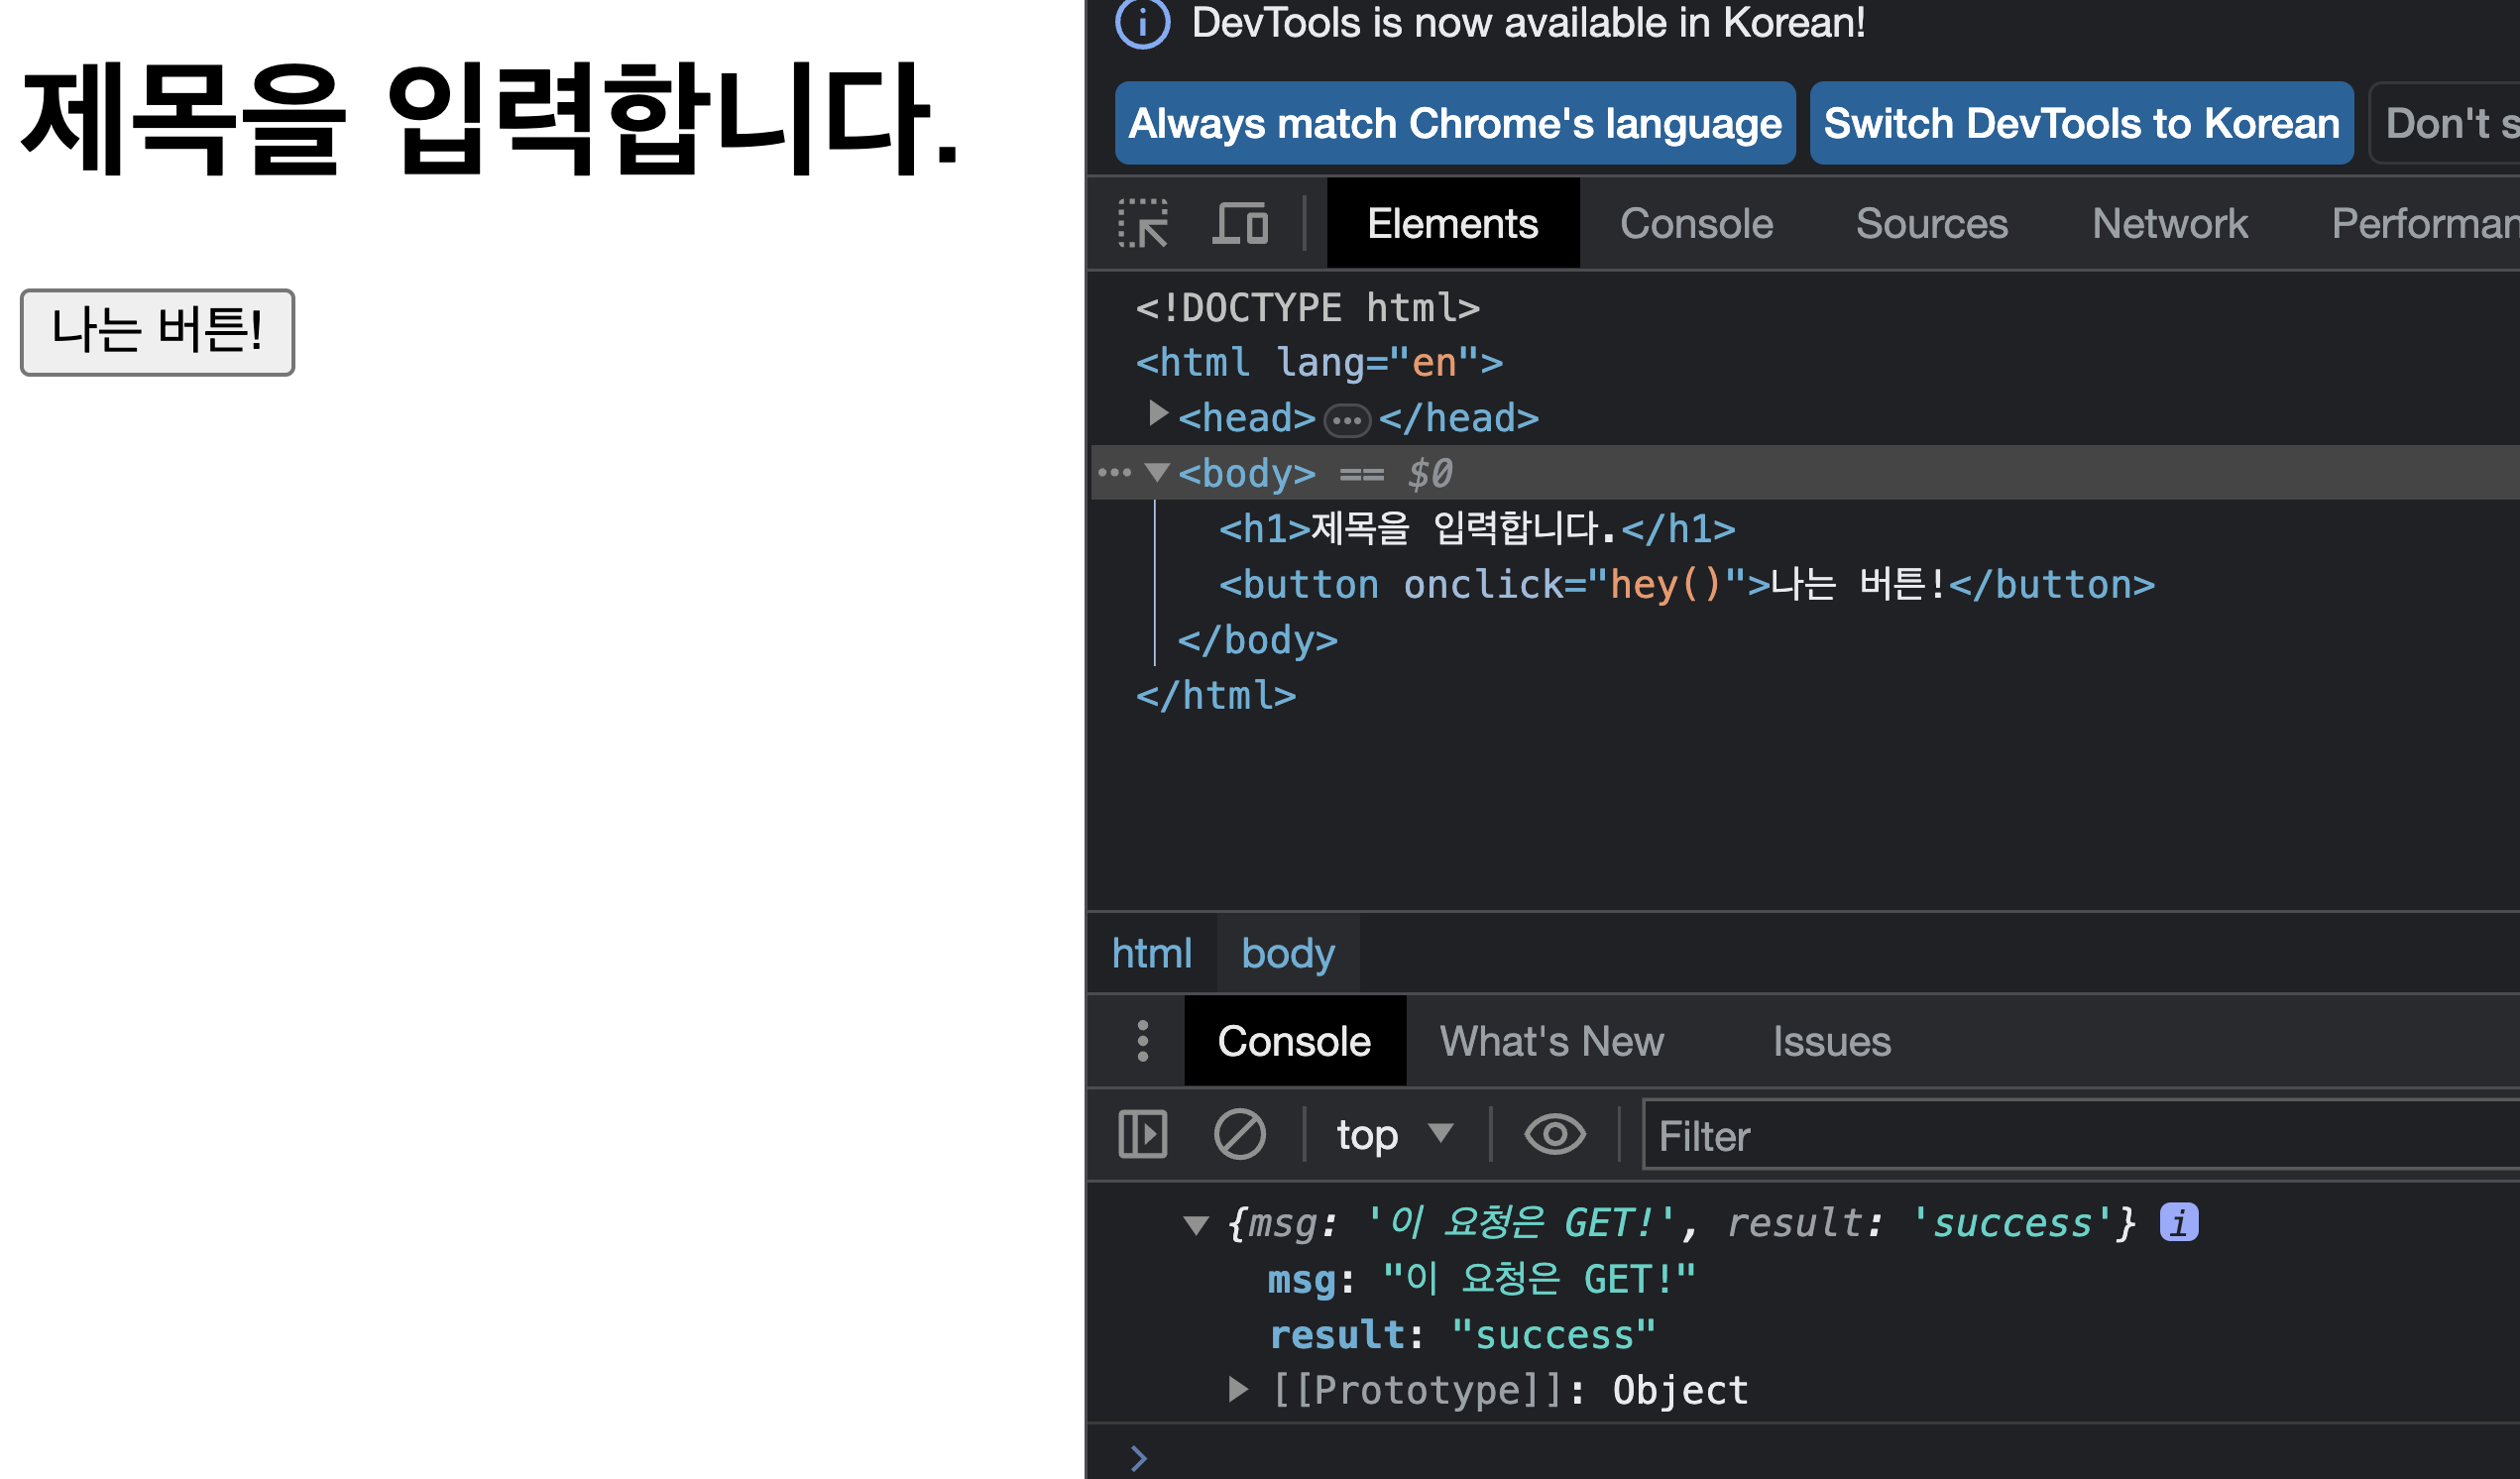
'/test' URL에서 버튼을 눌러 GET 요청, 응답을 테스트했다.
app.py의 코드
# 통상적으로 Flask framework를 사용할 때 가장 기본이되는 python파일을 app.py로 명칭한다.
# 변경 가능하나 통상적으로 사용하니 그대로 따라하자.
# render_template 를 추가로 임포트 했다.
# request를 추가로 임포트 했다.
# jsonify를 추가로 임포트 했다.
from flask import Flask, render_template, request, jsonify
app = Flask(__name__)

@app.route('/')
def home():
# render_template를 임포트한 뒤 다음처럼 root/templates/ 폴더 내 html을 가져올 수 있다.
   return render_template('index.html')

# get 방식 요청 예시
@app.route('/test', methods=['GET'])
def test_get():
#    title_give라는 데이터가 있으면 title_receive에 넣는다.
   title_receive = request.args.get('title_give')
#    title_receive를 출력해보자.
   print(title_receive)
   return jsonify({'result':'success', 'msg': '이 요청은 GET!'})


if __name__ == '__main__':
   app.run('0.0.0.0',port=5001,debug=True)
index.html 의 코드
<!DOCTYPE html>
<html lang="en">

<head>
    <meta charset="UTF-8">
    <meta name="viewport" content="width=device-width, initial-scale=1.0">
    <script src="https://ajax.googleapis.com/ajax/libs/jquery/3.5.1/jquery.min.js"></script>
    <title>Document</title>

    <script>
        function hey() {
            // get 방식 테스트용
            // /test라는 URL에 요청을 해서 json데이터로
            // 콘솔에 data를 찍자.
            fetch("/test").then(res => res.json()).then(data => {
                console.log(data)
            })

        }
    </script>
</head>

<body>
    <h1>제목을 입력합니다.</h1>
    <button onclick="hey()">나는 버튼!</button>
</body>

</html>
실행 시 jsonify로 반환된 응답이 html의 console.log(data)로 전송되어 브라우저에서 json데이터(key,value)를 확인 할 수 있었다.

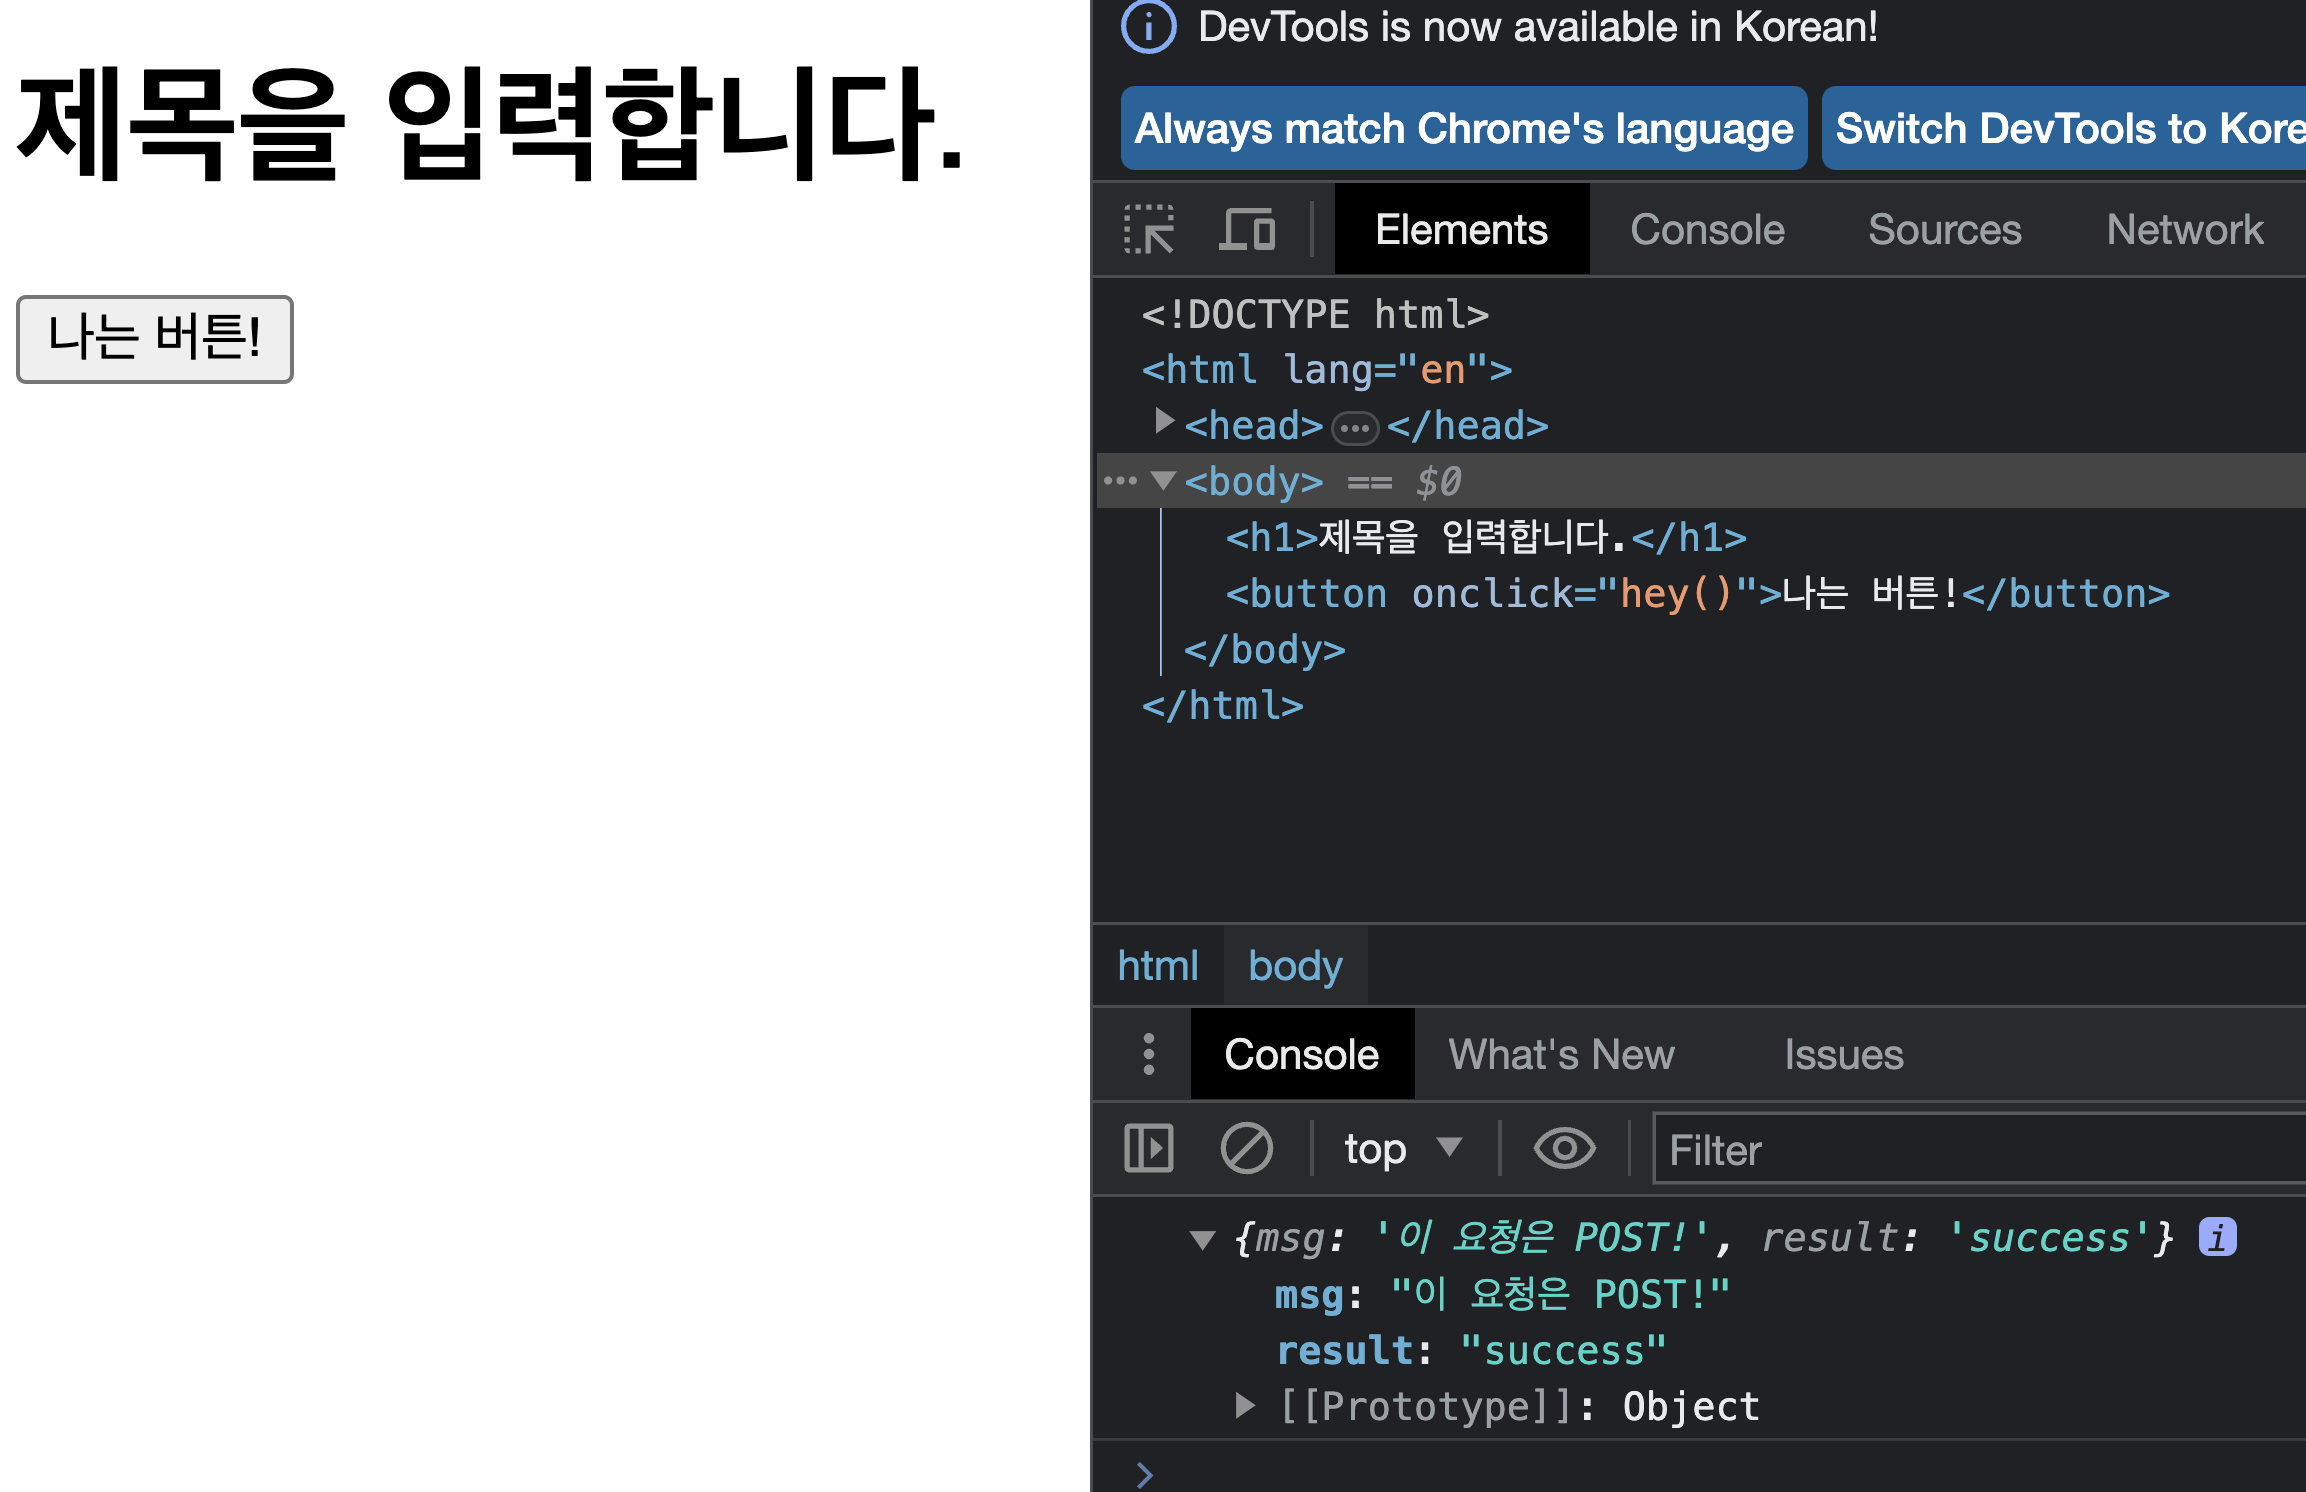
2. POST 방식 실습
GET부분을 진행해보면서 요청, 데이터 흐름, 응답, 출력 까지의 과정이
뭔가 머릿속에서 정리되지 않았다. 문법에 대한 이해 문제가 컸다고 생각했다.
POST 요청을 실습하면서 모르고 정확하지 않은 부분들을 하나씩 뜯어보고
흐름을 파악하는데 주목했다.
특히 이 부분은 수도없이 반복될 중요한 부분이라 시작부터 좀 더 자세하게 공부하고 싶던 부분이었다.
app.py의 코드
# 통상적으로 Flask framework를 사용할 때 가장 기본이되는 python파일을 app.py로 명칭한다.
# 변경 가능하나 통상적으로 사용하니 그대로 따라하자.
# render_template 를 추가로 임포트 했다.
# request를 추가로 임포트 했다.
# jsonify를 추가로 임포트 했다.
from flask import Flask, render_template, request, jsonify
app = Flask(__name__)

@app.route('/')
def home():
# render_template를 임포트한 뒤 다음처럼 root/templates/ 폴더 내 html을 가져올 수 있다.
   return render_template('index.html')

# get 방식 요청 예시
# @app.route('/test', methods=['GET'])
# def test_get():
# #    title_give라는 데이터가 있으면 title_receive에 넣는다.
#    title_receive = request.args.get('title_give')
# #    title_receive를 출력해보자.
#    print(title_receive)
#    return jsonify({'result':'success', 'msg': '이 요청은 GET!'})

# post 방식 요청 예시(데이터 흐름은 index.html [1]부터 시작해서 보기)
# [4] 객체 formData가 이곳에 도착하고
@app.route('/test', methods=['POST'])
# [5] test_post()가 실행된다
def test_post():
# [6] request.form에 따라 key값이 title_give인 value("블랙팬서")이 title_receive로 담아지고
   title_receive = request.form['title_give']
# [7] title_receive가 출력된다. (블랙팬서)
   print(title_receive)
# [8] 출력까지 메서드 수행이 완료되었으니 jsonify로 dictionary 형태의 아래 {'key1':'value1', 'key2':'value2'}를 json 형태로 반환된다. [응답]
   return jsonify({'result':'success', 'msg': '이 요청은 POST!'})

if __name__ == '__main__':
   app.run('0.0.0.0',port=5001,debug=True)
index.html의 코드
<!DOCTYPE html>
<html lang="en">

<head>
    <meta charset="UTF-8">
    <meta name="viewport" content="width=device-width, initial-scale=1.0">
    <script src="https://ajax.googleapis.com/ajax/libs/jquery/3.5.1/jquery.min.js"></script>
    <title>Document</title>

    <script>
        function hey() {
            // // get 방식 테스트용
            // // /test라는 URL에 요청을 해서 json데이터로
            // // 콘솔에 data를 찍자.
            // fetch("/test").then(res => res.json()).then(data => {
            //     console.log(data)
            // })

            // post 방식 테스트용
            // [1] 프론트의 hey버튼을 누르면, hey()가 실행되는데 FormData() 생성자(Constructor)는 새로운 FormData객체를 만듦
            let formData = new FormData();
            // [2] 아래 데이터가 append로 key/value 들로 채워지고 객체 변수인 formData에 담긴다.
            formData.append("title_give", "블랙팬서");
            // [3] 데이터가 있는 객체 formData는 fetch로 /test로 POST방식으로 app.py 백엔드로 이동된다. [요청]
            fetch("/test", { method: "POST", body: formData })
            // [9] -> app.py에서 jsonify를 통해 반환된 json 데이터를 json 형태로 [응답을 전송].
                .then(res => res.json())
            // [10] 그리고 위 전송된 json 데이터를 브라우저 console에 출력한다.
                .then(data => {
                    console.log(data)
            })

        }
    </script>
</head>

<body>
    <h1>제목을 입력합니다.</h1>
    <button onclick="hey()">나는 버튼!</button>
</body>

</html>
이 부분은 요청(버튼 누르기)시점부터 어떤 코드가 실행되는지 한줄씩 흐름을 따라가보았다. 그나마 한줄씩 모르는 것들을 찾고, 이 실습 코드에서는 왜 이렇게 진행됐는지 파악하면서 보니까 어느정도 이해는되었지만 아직도 궁금증이 남아있다. 좀더 정리해서 질문방이나 코드리뷰시간에 이해를 도와줄 의견을 여쭤봐야겠다.
기본적으로 파악한 흐름은 다음과 같다.
이렇게 하나씩 뜯어보고 GET방식을 다시 보니까 이해에 도움이 되긴 했다.
index.html에서(프론트)
[1] 프론트의 hey버튼을 누르면, hey()가 실행되는데 FormData() 생성자(Constructor)는 새로운 FormData객체를 만듦
[2]("title_give", "블랙팬서")가 append로 key/value 들로 채워지고 객체 변수인 formData에 담긴다.
[3] Fetch() - 데이터가 있는 객체 formData는 fetch로 /test로 POST방식으로 app.py 백엔드로 이동된다. [요청]
app.py로 이동(백엔드)
[4] 객체 formData가 이곳에 도착하고
[5] test_post()가 실행된다
[6] request.form에 따라 key값이 title_give인 value("블랙팬서")이 title_receive로 담아지고
[7] title_receive가 출력된다. (블랙팬서)
[8] 출력까지 메서드 수행이 완료되었으니 jsonify로 dictionary 형태의 아래 {'key1':'value1', 'key2':'value2'}를 json 형태로 반환된다. [응답]
index.html로다시(프론트)
[9] 첫번째 .then() - app.py에서 jsonify를 통해 반환된 json 데이터를 json 형태로 [응답을 전송].
[10] 두번째 .then() - 그리고 위 전송된 json 데이터를 브라우저 console에 출력한다.
이거 이대로 애매하게 넘어가지말고 계속 실습을 통해 이러한 흐름이 맞는지 감을 익혀야겠다..(위기감을 느낌)


이 부분을 뜯어보면서 이해하느라 시간이 많이 소요되었다.
그나마 자료들을 찾아보면서 어느정도 흐름의 이유나 메서드 사용 이유들을 알것 같다. 아직도 의문점이 너무 많이 남아있다.
- fetch().then().then()의 수행 순서 (https://triplexblog.kr/130)
fetch("/test").then(res => res.json()).then(data => {
            //     console.log(data)
// })- 위를 이해하기 위한 Promise 객체에 대한 이해 (+동기, 비동기에 대한 내용)(https://developer.mozilla.org/ko/docs/Web/JavaScript/Reference/Global_Objects/Promise)
- request.form 이해
The docs describe the attributes available on the request. In most common cases request.data will be empty because it's used as a fallback:
|
- jsonify : 파이썬 딕셔너리를, JSON 데이터로 만들어주는 기능 ->하고 반환됨[응답]
- res.json() : 위 반환 값을 JSON 으로 [응답을 전송] -- 이 부분 정확한 이해가 더 필요하다. jsonify로 json을 반환(응답)했으면 된 것 아닌가? 브라우저에 json 응답을 다시 보내야 하기때문에인가??
- .then(data => {console.log(data)} 이 부분은 화살표 함수 때문에 너무 햇갈린다. 이 문제는 계속 나타나는데 빠르게 공부해야겠다.
(https://developer.mozilla.org/ko/docs/Web/JavaScript/Reference/Functions/Arrow_functions)
해당 스터디는 아래 깃을 통해 업데이트 되고 있습니다.
https://github.com/yzpocket/Sparta99training
GitHub - yzpocket/Sparta99training
Contribute to yzpocket/Sparta99training development by creating an account on GitHub.
github.com
'Python&Flask Tutorials, AWS EB > 4th WEEK Flask, GET&POST' 카테고리의 다른 글
| [웹개발 종합] 4주차 강의 일지 (WIL) (0) | 2023.07.13 |
|---|---|
| [Flask] Flask Framework 04 첫 사용 (render_template) (0) | 2023.07.08 |
| [Flask] Flask Framework 03 첫 사용 (gitignore 등록) (0) | 2023.07.08 |
| [Flask] Flask Framework 02 첫 사용 (서버만들기 -2), MacOS Port 5000 오류 해결 (0) | 2023.07.08 |
| [Flask] Flask Framework 01 첫 사용 (서버만들기 -1) (0) | 2023.07.08 |


